Learning Center
Short, step-by-step walkthroughs for every part of SealedRoute — for managers, drivers, and the people you deliver to. Follow these whenever you get stuck.
1. Getting started: sign in
TeamEach person on your team has their own login. Managers run dispatch and compliance; drivers capture pickups and deliveries.
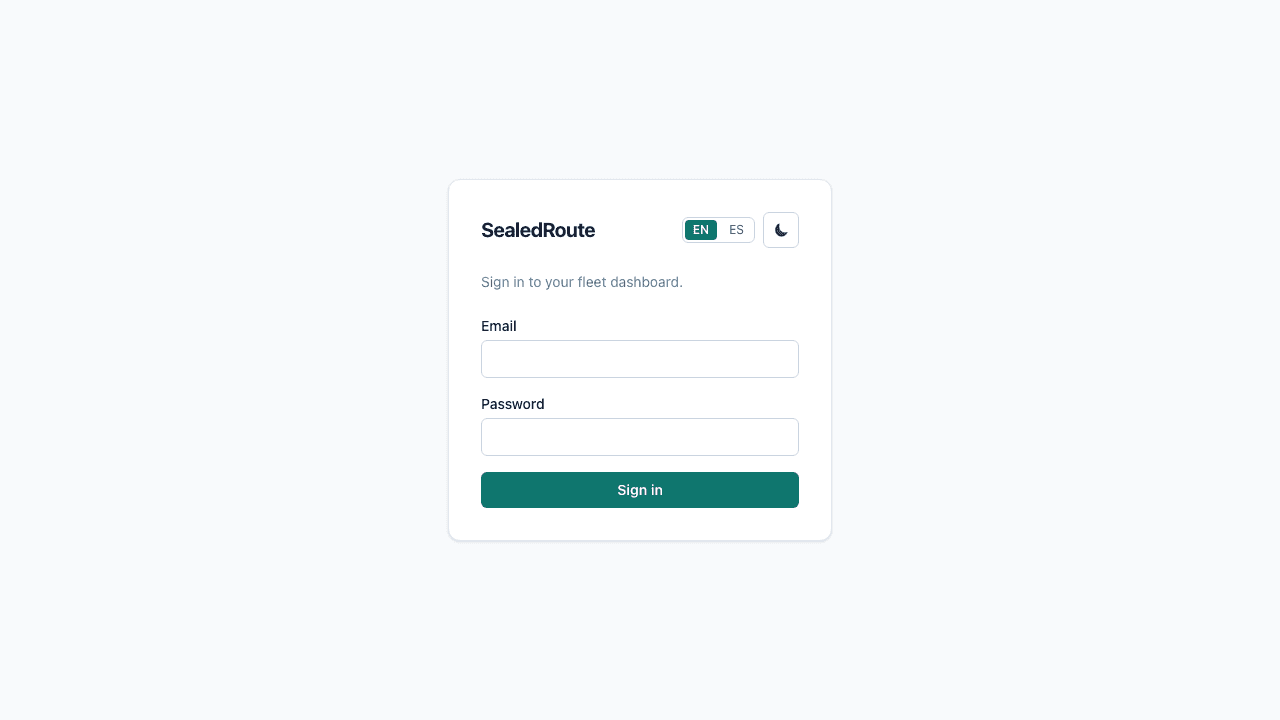
- 1The email field where you enter your account's email address.
- 2The password field and the sign-in control that submits it.
- Open the app and enter the email and password for your account.
- Managers land on the dashboard; drivers land on My Routes.
- If your team requires two-factor sign-in, open Settings to set it up once.
- Use the language switch in the header if you prefer Spanish.
What to expect
You land on the right home screen for your role — managers on the dashboard, drivers on My Routes — and can navigate the rest of the app.
If something goes wrong
If sign-in fails, confirm you are using the exact email your manager invited and check for a typo in the password. After repeated failed attempts the account locks temporarily — wait for the lockout to clear, or contact your fleet manager or operator for help signing in.
2. Create a route (manager)
ManagerA route is one pickup-to-delivery job. You can create it by hand, or let the app read a dispatch email for you.
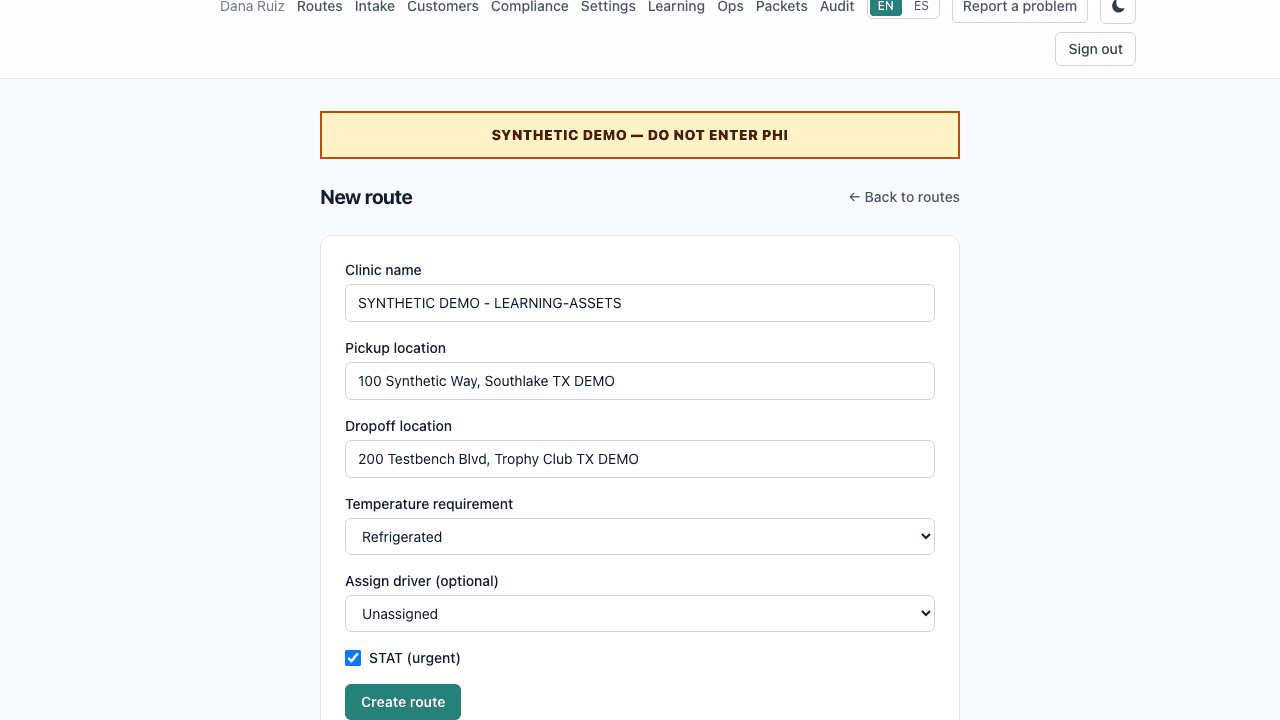
- 1The pickup location and drop-off lab fields.
- 2The temperature requirement control.
- 3The optional driver selector, the special-handling STAT (urgent) toggle, and the Create route action.
- Go to Routes, then choose New route.
- Enter the clinic or pickup location, the drop-off lab, the temperature requirement, and any special handling such as STAT.
- Optionally assign a driver right away, or leave it unassigned and assign one later.
- Save. If you assigned a driver, the route is created assigned to them; otherwise it appears on the board unassigned until you assign one from the route detail.
What to expect
The new route appears on the dispatch board with the right pickup, drop-off, temperature requirement, and any special handling — assigned to the driver you chose, or unassigned and ready to assign from the route detail if you did not pick one.
If something goes wrong
If the route does not appear on the board, confirm you saved it; refresh the board if it was already open.
3. Assign a driver
ManagerIf a route was saved without a driver, it stays unassigned until you assign one — you can also assign a driver right away when you create the route.
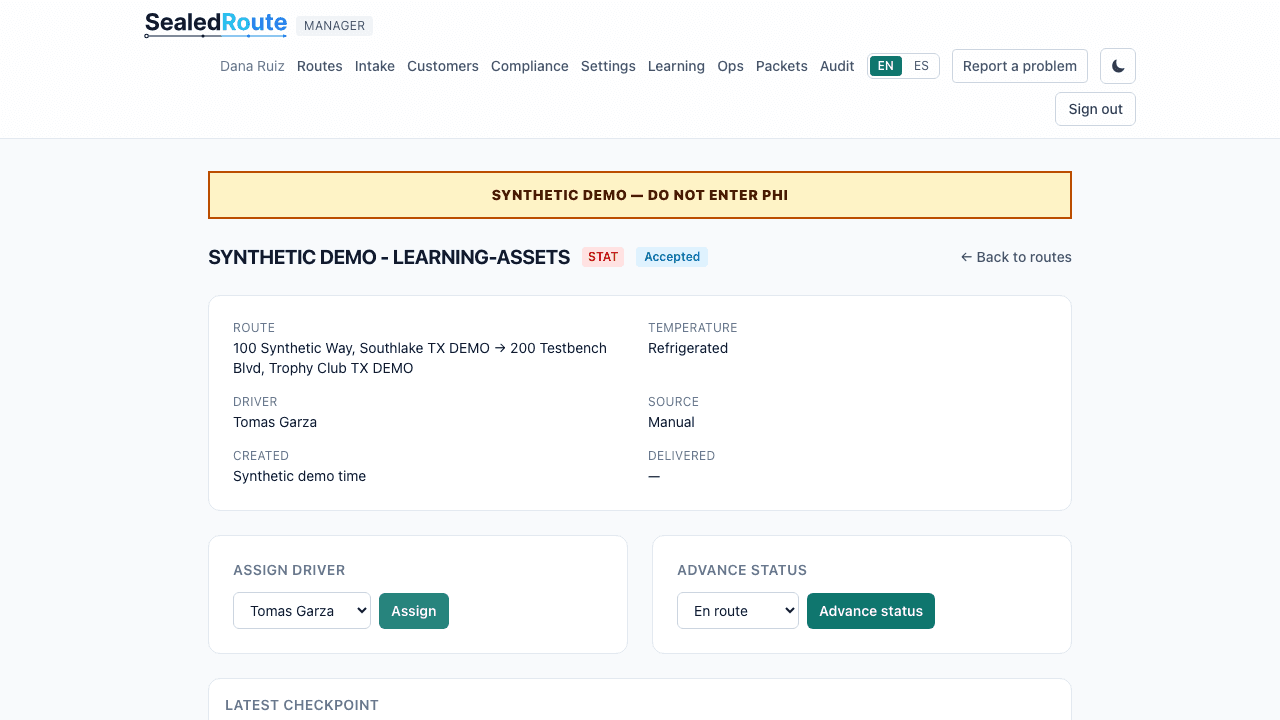
- 1The driver selector where you pick an available driver.
- 2The Assign control that saves the selection; the assigned driver then appears in the route details above.
- Open the route from the dispatch board.
- Choose Assign driver and pick an available driver.
- Save the assignment — the assigned driver sees it under My Routes once they refresh or reopen the app.
- Reassign the same way if plans change before pickup.
What to expect
The route shows the assigned driver's name on the board, and the driver sees it on their phone under My Routes.
If something goes wrong
If a driver does not see the route, confirm the assignment saved and that the driver is signed in with the right account.
4. Capture a pickup (driver)
DriverDrivers record proof of pickup on their phone. Every action is time-stamped and locked so it cannot be changed later.
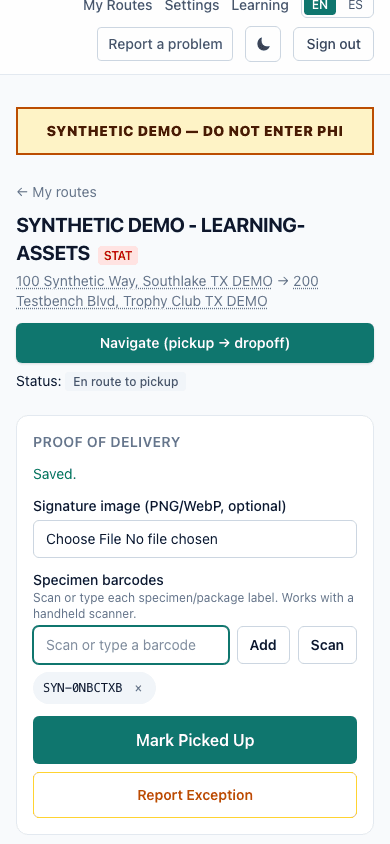
- 1The signature capture and specimen barcode scan fields that record pickup evidence.
- 2The Mark Picked Up action that records the pickup; the STAT badge near the title marks this run as urgent priority.
- Open My Routes and tap the route you are working on.
- Tap Start / En route to pickup when you leave for the clinic.
- At the clinic, capture the signature and scan each specimen barcode, or type it in if you have no scanner.
- Tap Mark Picked Up. For a STAT specimen, confirm the priority prompt.
- If you lose signal, stay on the same screen — retry the same action once connectivity returns.
What to expect
The pickup is time-stamped, locked, and visible to the manager on the dispatch board.
If something goes wrong
If a capture will not submit, stay on the same screen and retry once you have signal again; the app does not save the action anywhere else while you are offline.
5. Capture a delivery (driver)
DriverDrivers record proof of delivery the same way, completing the locked, time-stamped record for the route.
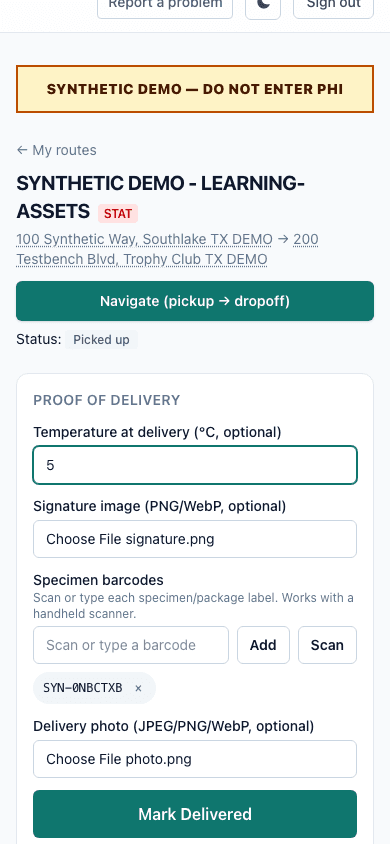
- 1The delivery signature or photo, barcode confirmation, and temperature-at-delivery evidence.
- 2The Mark Delivered action that completes the delivery; the STAT badge near the title marks this run as urgent priority.
- Open My Routes and tap the route you are delivering.
- At the lab, capture the hand-off signature or photo, confirm the barcode if applicable, and enter the temperature at delivery.
- Tap Mark Delivered. For a STAT specimen, confirm the priority prompt.
- If you lose signal, stay on the same screen — retry the same action once connectivity returns.
What to expect
The delivery is time-stamped, locked, and the route moves to completed on the dispatch board.
If something goes wrong
If a capture will not submit, stay on the same screen and retry once you have signal again; do not navigate away or the in-progress capture may be lost.
6. Generate a compliance packet (manager)
ManagerAn audit packet contains an embedded signed snapshot of every delivery record matching the date range and filters you choose, which you can show a lab or auditor.
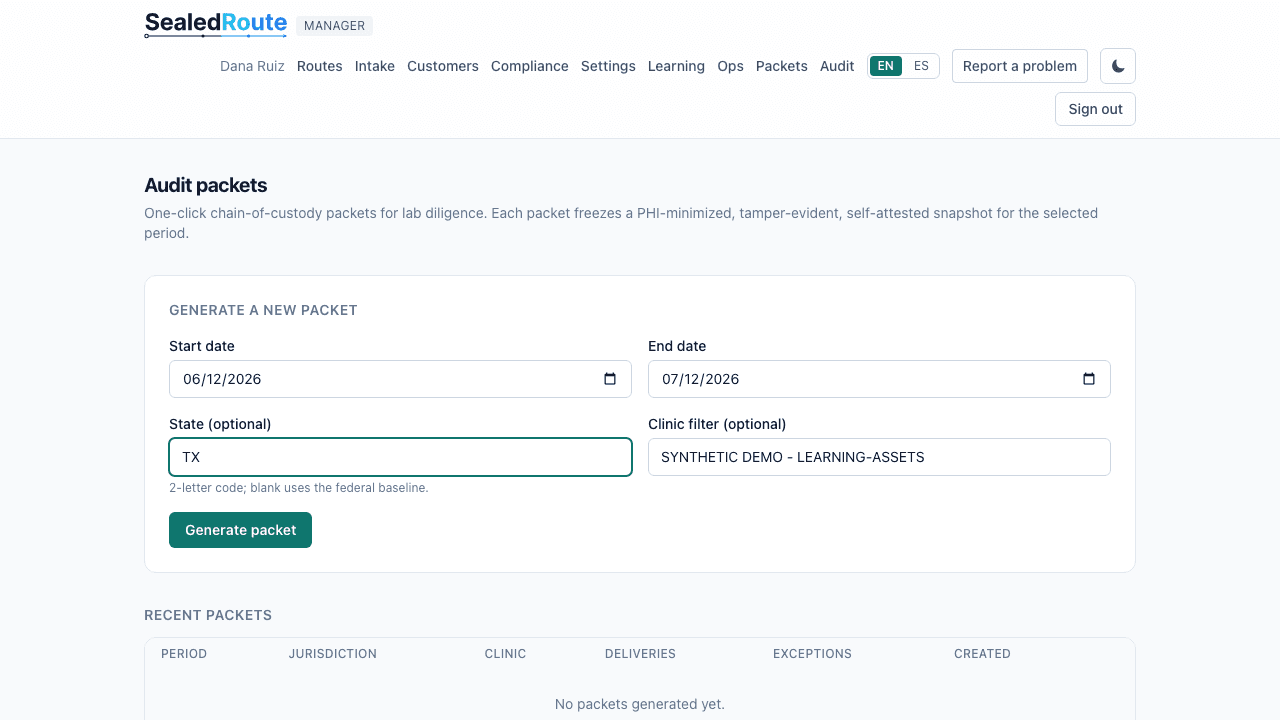
- 1The date range, optional clinic filter, and jurisdiction (state) controls.
- 2The Generate packet action that builds the chain-of-custody packet for the selected period.
- Open Audit packets.
- Choose a start and end date, and optionally narrow the records to one clinic by name.
- Optionally enter a state — that selects the packet's jurisdiction for its compliance attestation and required frameworks; it does not filter which records the packet covers.
- Generate the packet — SealedRoute signs its embedded snapshot so anyone can confirm that snapshot has not changed since signing.
- Download the packet file to email or print for the lab.
What to expect
The packet downloads with an embedded signed snapshot you can hand to a lab or auditor.
If something goes wrong
If generation fails because the date range covers too many records, narrow the range or filter by clinic before trying again.
7. Verify a packet's signed snapshot
RecipientAnyone — including a lab that received a packet — can independently check its embedded signed snapshot without logging in.
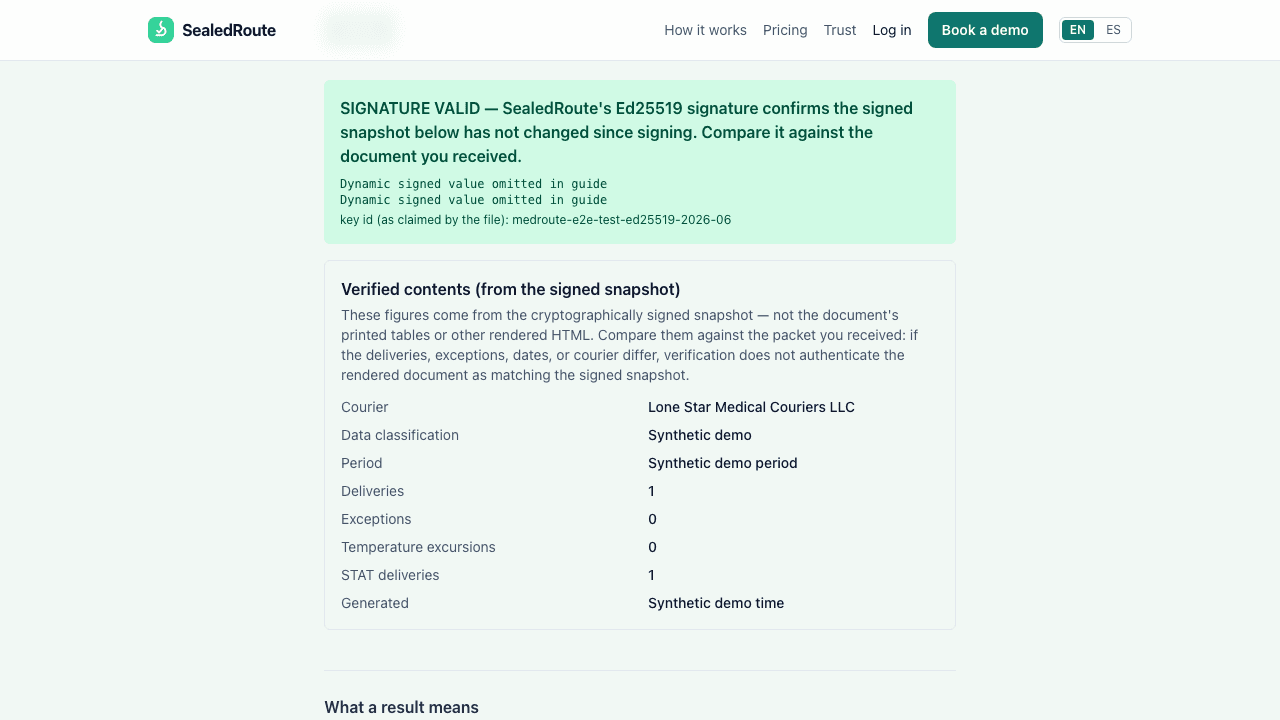
- 1The SIGNATURE VALID result confirming the packet's embedded signed snapshot was issued by SealedRoute and has not changed since signing.
- Open the public Verify page.
- Upload the packet file — SealedRoute shows SIGNATURE VALID when the embedded signed snapshot was issued by SealedRoute and has not changed since signing.
- If the uploaded packet's snapshot or signature does not validate, the verifier reports a mismatch or hash-only result instead.
- Instead of uploading, you can paste a snapshot's JSON along with its expected hash — this is a separate hash-only check that only confirms the data matches that hash; it never reports SIGNATURE VALID, even when the numbers match.
What to expect
Uploading the packet file reports SIGNATURE VALID when the embedded signed snapshot was issued by SealedRoute and has not changed since signing. Pasting a snapshot with its expected hash only ever confirms a hash match — it is not a substitute for uploading and cannot report SIGNATURE VALID.
If something goes wrong
If an uploaded packet reports a mismatch or hash-only result, do not treat it as valid — request a fresh packet from the sender. A hash-only result from a pasted snapshot is expected behavior, not an error; upload the packet file if you need signature validation.
8. Turn a pasted dispatch message into a route
ManagerIf a clinic emails or texts you a pickup, paste that message into Intake and SealedRoute parses it into a route draft for you to review.
- Open Intake and paste the clinic's dispatch email or text into the message box.
- Choose Parse. SealedRoute fills in a draft with the clinic, pickup, drop-off, temperature, and STAT priority it found.
- Review the draft and resolve any warnings, such as a missing address or a detected STAT, correcting fields as needed.
- Choose Create route to confirm the reviewed fields; the raw pasted message is never saved.
What to expect
A new route is created from the fields you reviewed and confirmed, ready to assign a driver.
If something goes wrong
If parsing misses or misreads details, correct the fields yourself before confirming — nothing is created until you choose Create route.
9. Give a lab the customer portal
RecipientYour lab or clinic customers can sign in to a private, read-only portal to view their own routes, delivery status, and saved pickup and dropoff addresses — no app install, no password to remember.
- Make sure the customer record has the right contact email.
- The customer opens the portal and requests a sign-in link by email.
- They click the emailed link to sign in securely for a short session.
- They see only their own routes, delivery status, and saved pickup and dropoff addresses.
What to expect
The customer can sign in with just an emailed link and see only their own routes and addresses.
If something goes wrong
If the emailed link does not arrive, confirm the customer record has the correct email and ask them to check spam.
10. Choose a plan and start checkout
ManagerPlans are priced by driver count. Billing is handled by Stripe; SealedRoute never stores card numbers.
- Open the Pricing page to compare Solo, Starter, Fleet, and Pro by driver count and features.
- As a manager, open Settings and find the Billing section.
- When billing is enabled for your fleet, choose a plan there to start checkout, processed securely by Stripe.
- If Settings shows billing as unavailable, request assisted activation or a guided demo from your SealedRoute contact instead of starting checkout yourself.
What to expect
The plan activates once Stripe confirms the checkout/subscription started from Settings — a supported trial checkout may activate the plan with a $0 first invoice and charge the card later, so activation does not always mean payment was already collected. SealedRoute never stores card data itself.
If something goes wrong
If Settings shows billing as unavailable, do not expect a Pricing-page checkout — request assisted activation or a demo. If checkout itself fails, retry with a different card or contact support — SealedRoute never sees or stores the card number.